
The construction of InFINNity Deck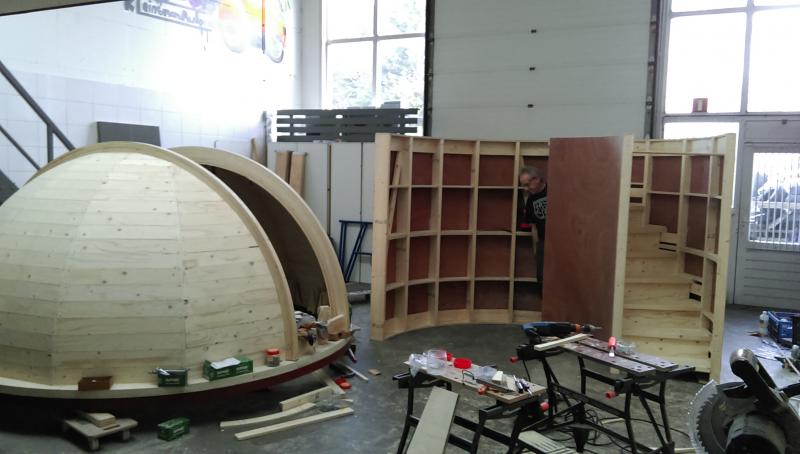 Figure 1: The dome, quarter cylindrical wall and spiral staircase of the observatory nearing their completion. In January 2018 my brother in law and I started constructing the observatory. The observatory consists of two stacked layers, the lower of which is mounted on the concrete ceiling of our workshop and consists of the pier and two quarter cylindrical sections, one of which contains the spiral staircase to the observation platform. The upper layer is the actual observatory and is named InFINNity Deck, after grandnephew Finn who gave the final incentive to build it (see the info page). In total the observatory consists of thirteen prefab parts, most of which were built by ourselves. The parts we could not manage were the construction of the large steel parts (the two rings and pier), the zinc cladding of the dome, and making the roof water tight again. Once finished the following prefab parts were put into place in a single day using a crane: 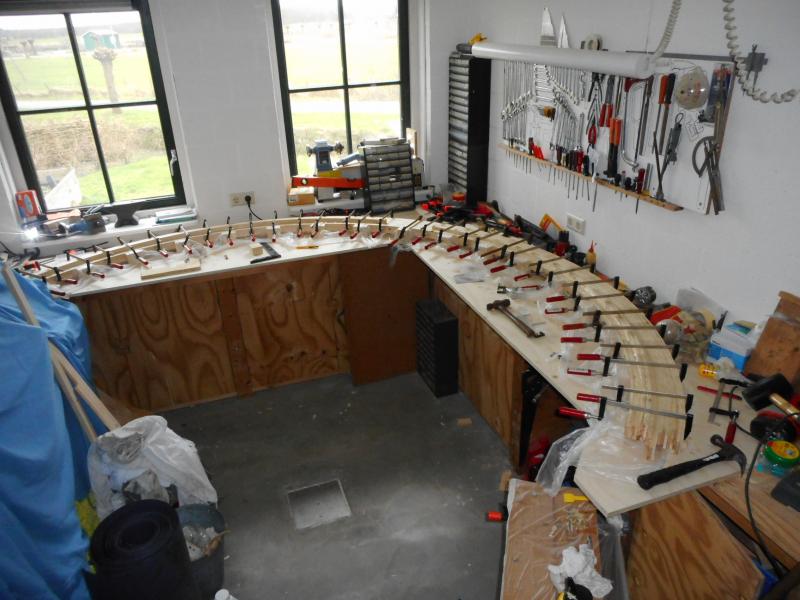 Figure 2: The first of two main rafters of the dome in its mold.
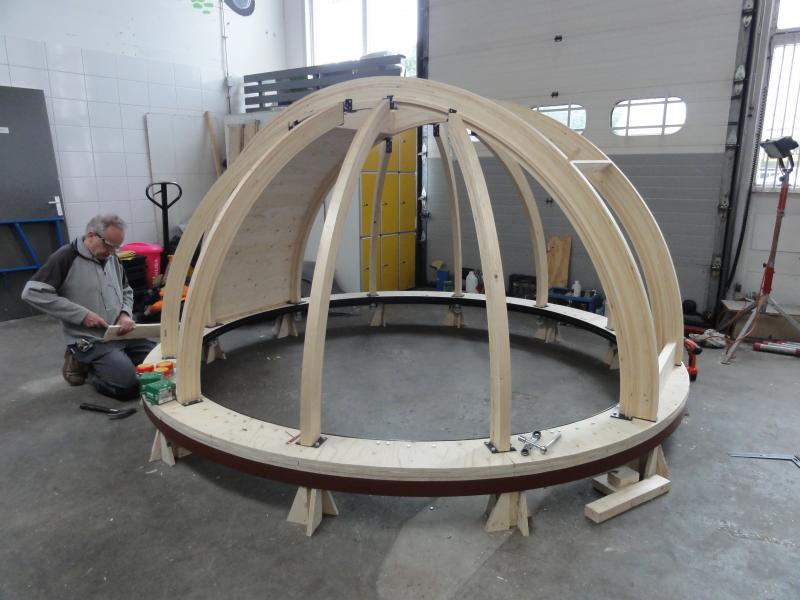 Figure 3: After the rafters were placed the wooden cladding could be mounted. Creating the rafters took us about one month, after which we made the four wall sections of InFINNity Deck (see figure 10). In the meanwhile the steel base (see figure 11 and figure 12) of the dome was being constructed by a local construction company. These parts and the finalised dome were that large that they would not fit our already crowded workshop and so we moved to a temporarily rented one nearby. The steel base circle of the dome is cladded with three layers of pine plywood (see figure 13), a job befriended backyard astronomer Rob Musquetier assisted with, to fit the 44 millimetres thick rafters. After having finished the circular base, the rafters could be placed (see figure 3 and figure 14). The side rafters are mounted to the main rafters using steel hinges (see figure 15), as suggested by befriended structural engineer Gerrit Tentij. Then, assisted by my wife Ria Twisk, the rafters were cladded with 18 millimetres thick pine plywood (see figure 16).  Figure 4: Zinc-worker Karel finalizing the zinc cladding. With the wooden cladding finished the zinc cladding could be done, a job that took two men two weeks and included the cladding of the two shutters. Making the whole dome watertight was a challenge, but thanks to their experience was successfully done. Apart from the two main rafters all of the dome was cladded in zinc. The main rafters were cladded with lead, on top of which the stainless steel tracks for the main dome shutter were mounted. In order to avoid contact between the stainless steel and the lead, a 20 millimetres HPDE spacer was used. The dome has two shutters. The main shutter rolls to the aft on the stainless steel tracks, the smaller secondary shutter has a hinged mounting and folds forward. Two large springs and a stainless steel wire facilitate the opening and closing of the approximately 60 kilograms main shutter. 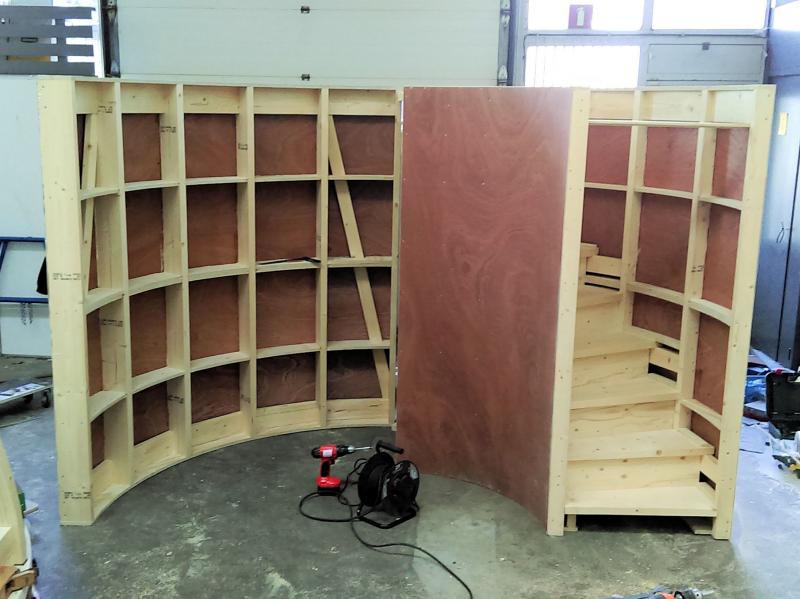 Figure 5: The two quarter circle sections with spiral staircase. After having finished the dome the lower layer of the observatory, consisting of two quarter circle sections, was built. One section was quite straightforward, the other had to contain a spiral staircase. Both sections were made of pine with thin waterproof plywood cladding as they form the outer walls of the space below InFINNity Deck. On top of these sections two sections of flooring rest that support the walls of InFINNity Deck. On top of these sections the steel track is attached. Getting the 3.2 metres diameter track (and base of the dome) zinc coated proofed to be too costly due to the difficulty of transporting them to a zinc treatment plant. Making them from stainless steel was just as costly. A good alternative was weathering steel, also known as COR-TEN or corten steel. This type of steel is only fractionally more expensive than normal steel, but does not corrode as easily, making the whole construction less susceptible to the elements. In order avoid corrosion in the first place a double layer of black Hammerite was applied to the visible parts. The other parts were covered in a double layer of red lead. 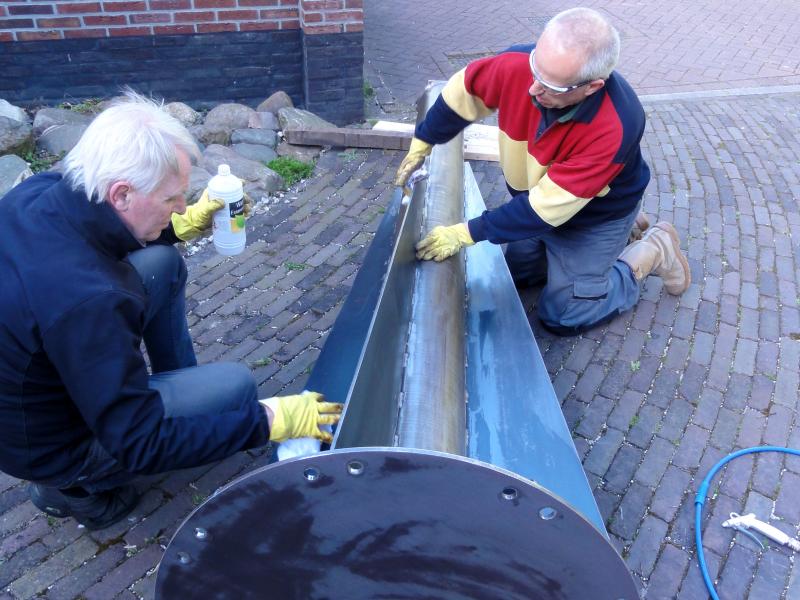 Figure 6: The pier being prepared for coating. In the meanwhile the 3.3 metres high and 300 kilogram pier had been constructed and was delivered at our home. The pier consists of a 244 millimetres diameter pipe of 7 millimetres wall thickness. It stands on a 80 centimetres diameter and 10 millimetres thick round baseplate and is kept stable using four small and four large stiffeners to avoid flexing and vibrations. In the base there are 16 holes to fixate the pier to the concrete floor using M12 chemical anchors. The last part to be constructed was the floor of InFINNity Deck. Having to carry half of the dome a beam spacing of 30 centimetres was used with beams 150 millimetres high (see figure 19). 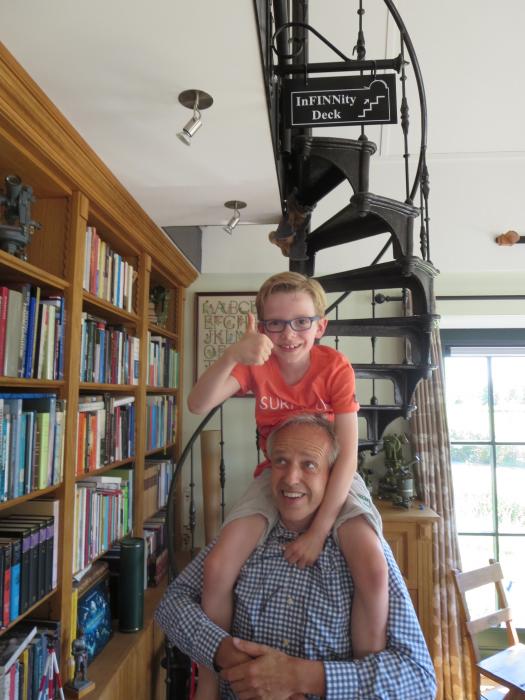 Figure 7: Grandnephew Finn and I below the sign he revealed the day of the opening (photo by P. van Eerden). Then, the first week of May 2018, and assisted by nephew Rick Settels I cut the roof open (see figure 20). The prefab elements were transported to our home and within a full working day they were all put in place and topped with the still shiny zinc dome (see figure 23). In the following days the roof was made watertight and additional cladding in the style of our home was added to the cylindrical outer wall (see figure 22). The weeks following electricity was installed and the interior plastered. The equipment arrived during this period on 18 May and that very same day first light was achieved, even though the mount was not yet aligned. Coincidentally that same evening I gave a talk on the building process at AWSV Metius, something they requested a few months earlier. From that moment on there was a lot to do, mainly getting grips on all the equipment and further finishing touches, like being able to open and close the lower shutter of the dome. Most of this was done in time before grandnephew Finn officially opened InFINNity Deck on Sunday 15 July 2018 (see figure 7 and figure 8). Ever since we had the best of summer weather giving great views for the time of year, resulting in the first photographs of the solar system. In the winter of 2021-2022 the mount was sent back to Italy for maintenance, which was a good opportunity to make the final piece of the observatory: the floor. Until that time it was still the bare underlayment that we walked on in the observatory and the idea was to have a finished floor in three types of wood. After initial requests at various parquettiers had failed to result in an affordable solution, I finally bought myself the proper tools and ordered a stack of 20mm thick Wengé, Amazakoue and Maple. From this wood I managed to produce a 16-pointed wind-rose, which (of course) is properly oriented to the true cardinal directions (see figure 24 and figure 25). If you have any questions and/or remarks please let me know. |
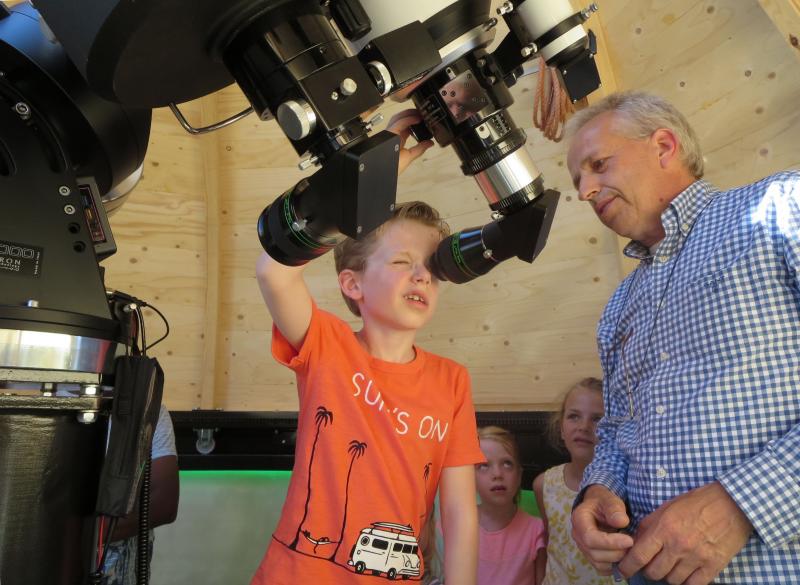 Figure 8: Grandnephew Finn looking through the apochromatic refractor at the opening (photo P. van Eerden). |
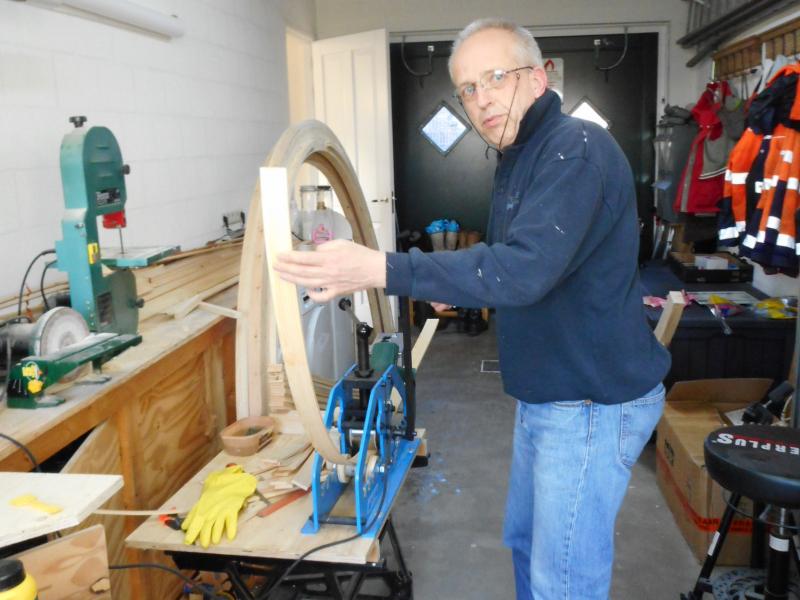 Figure 9: Bending the pine strips using a rolling mill. |
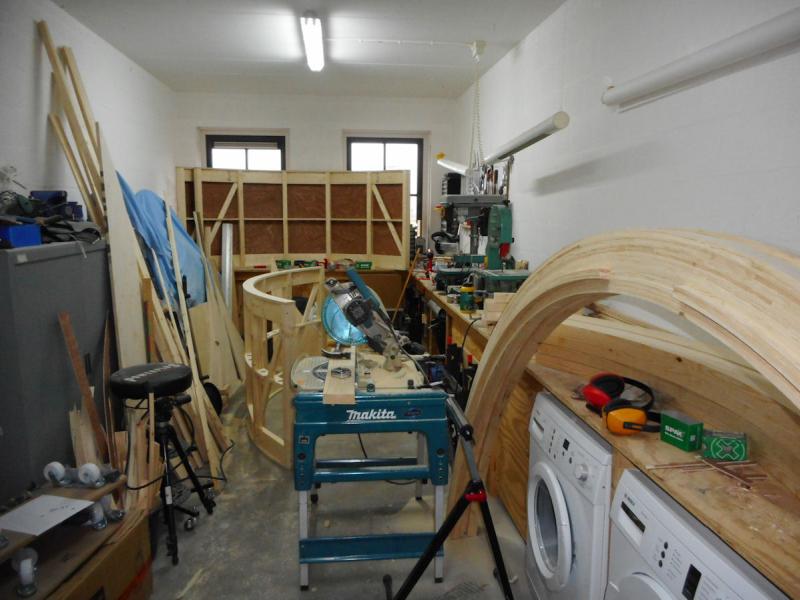 Figure 10: The four wall sections of InFINNity Deck in my crowded workshop. At the right the dome rafters. |
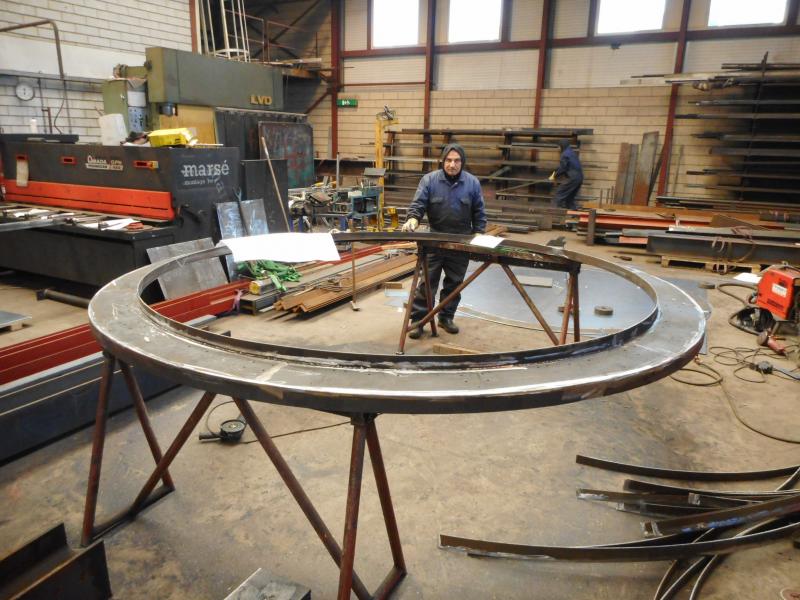 Figure 11: The base circle of the dome under construction. |
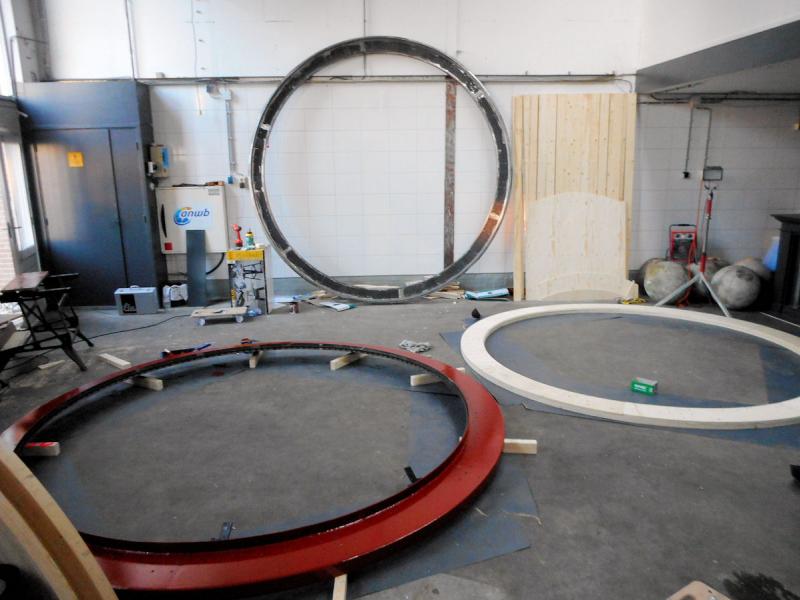 Figure 12: The steel base circle and pine plywood cladding. Against the wall the steel track. |
 Figure 13: The first two elements of the dome being bolted together, the rafters are in the background. |
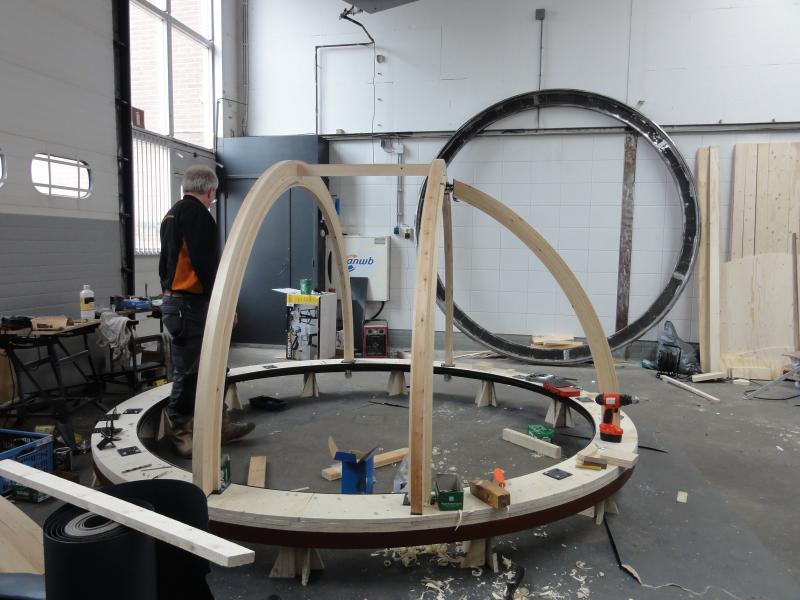 Figure 14: The two main rafters and the first side rafter mounted on the base. |
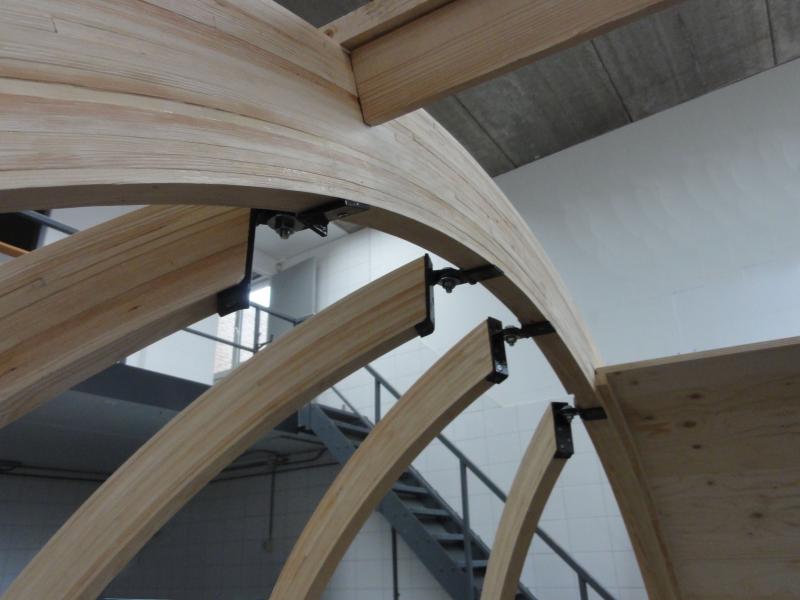 Figure 15: The side rafters are mounted to the main rafters using steel hinges. |
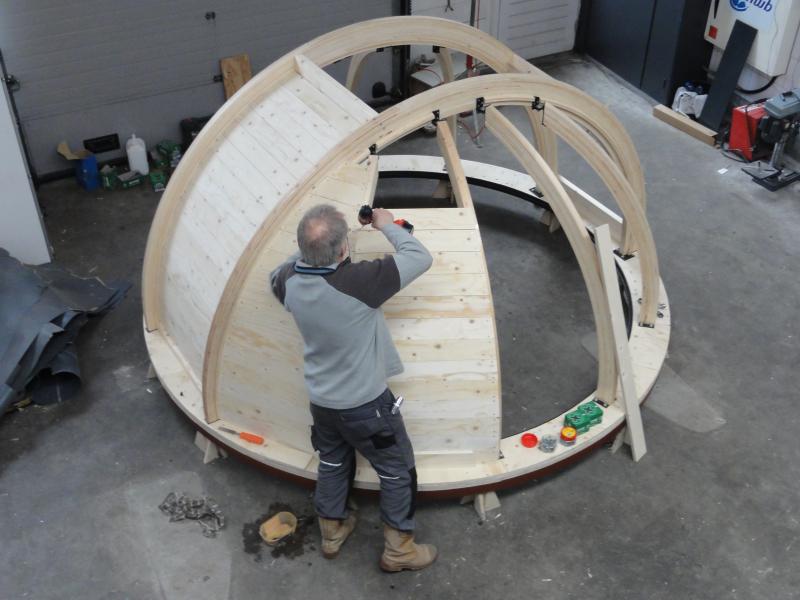 Figure 16: Cladding the rafters with pine plywood. |
 Figure 17: The dome partially cladded in zinc and the main shutter in place to test clearance. |
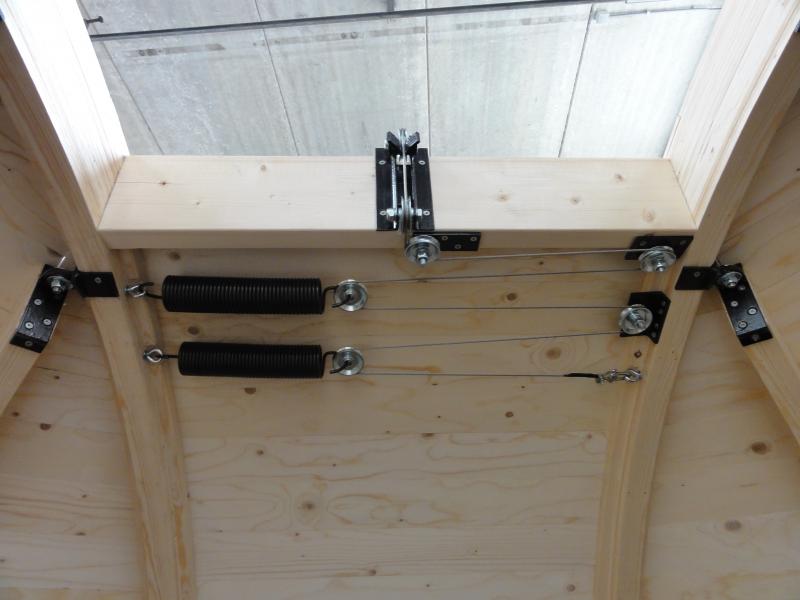 Figure 18: The supporting springs and wire for closing the main shutter. |
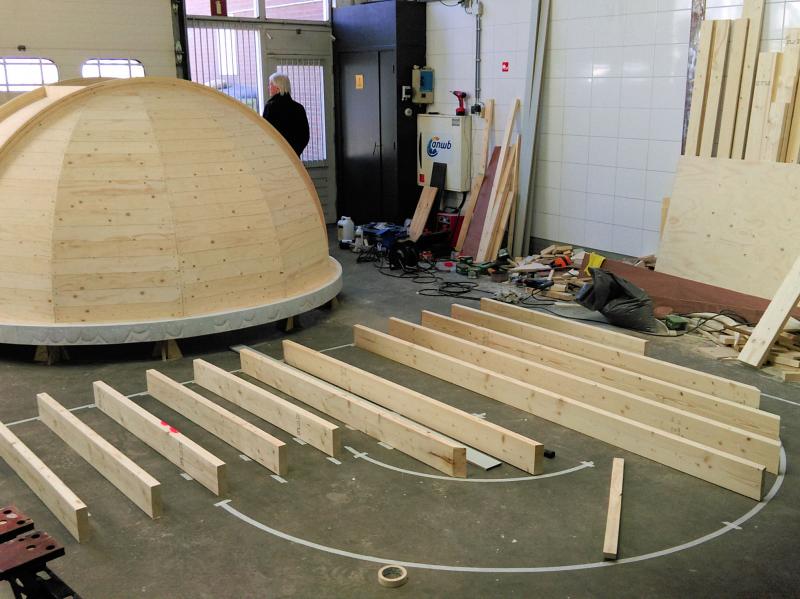 Figure 19: The floor of InFINNity Deck laid out. |
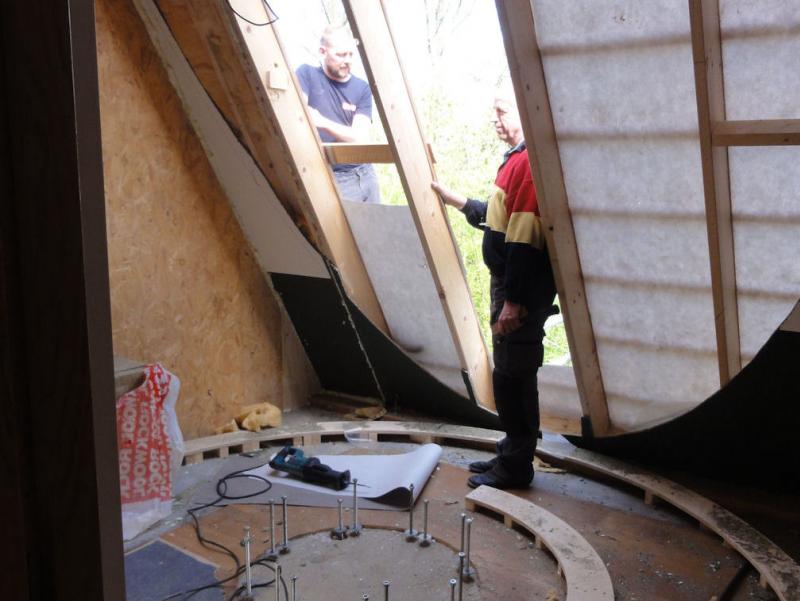 Figure 20: Going through the roof, assisted by my second oldest niece's husband (who is a fitter). |
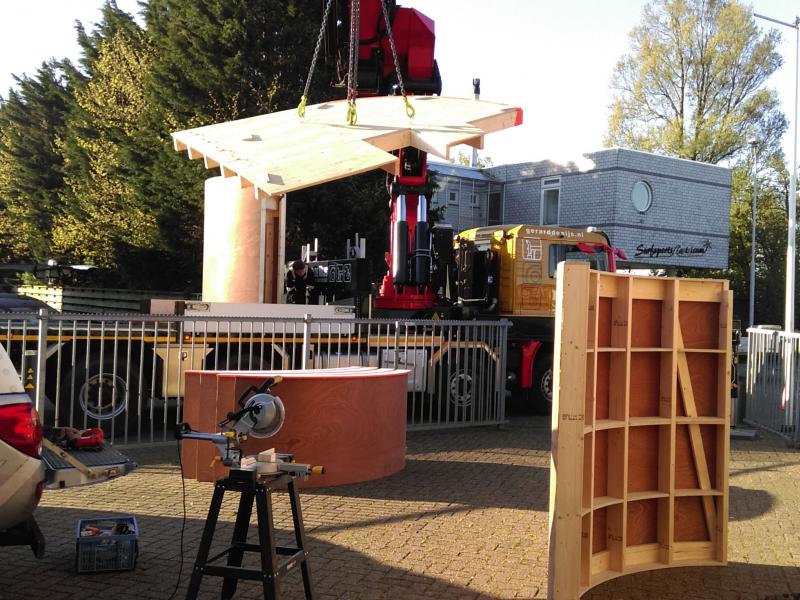 Figure 21: The prefab elements being loaded for transport. |
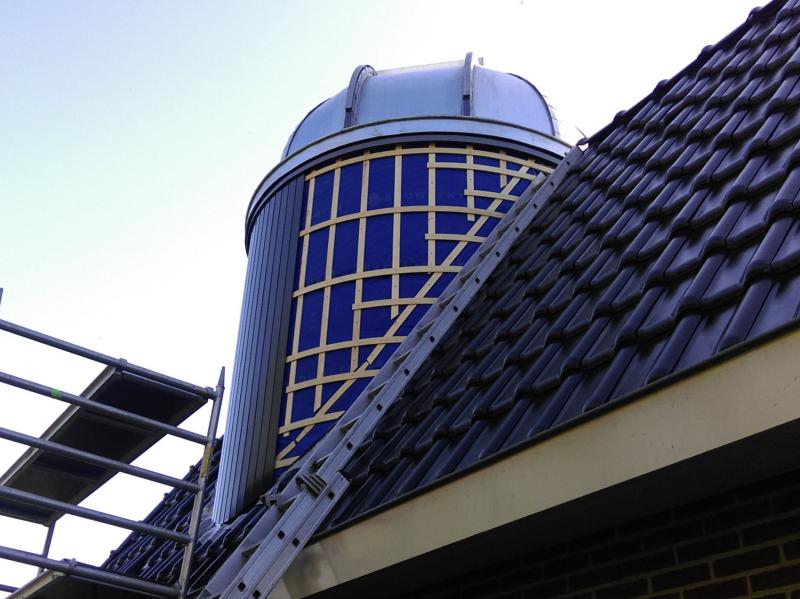 Figure 22: The outside of the observatory is cladded with red cedar and painted green. |
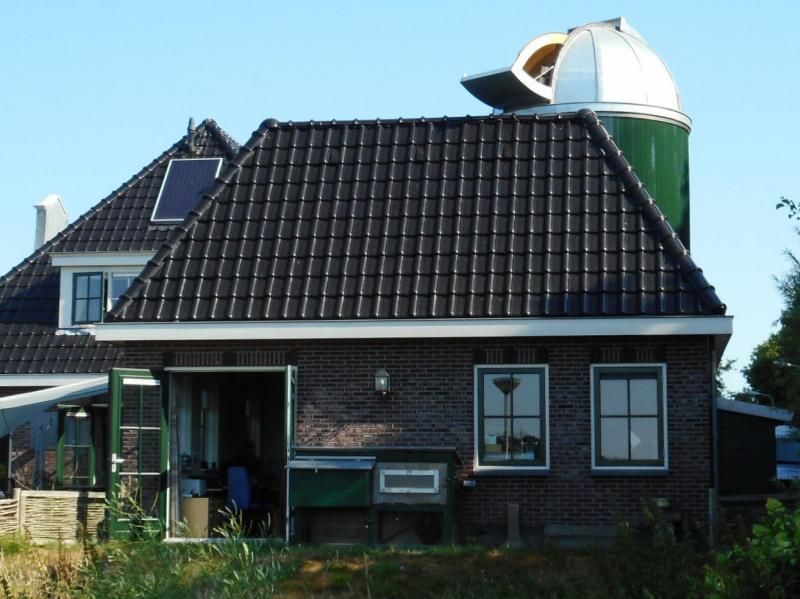 Figure 23: The finished observatory ready for observing. |
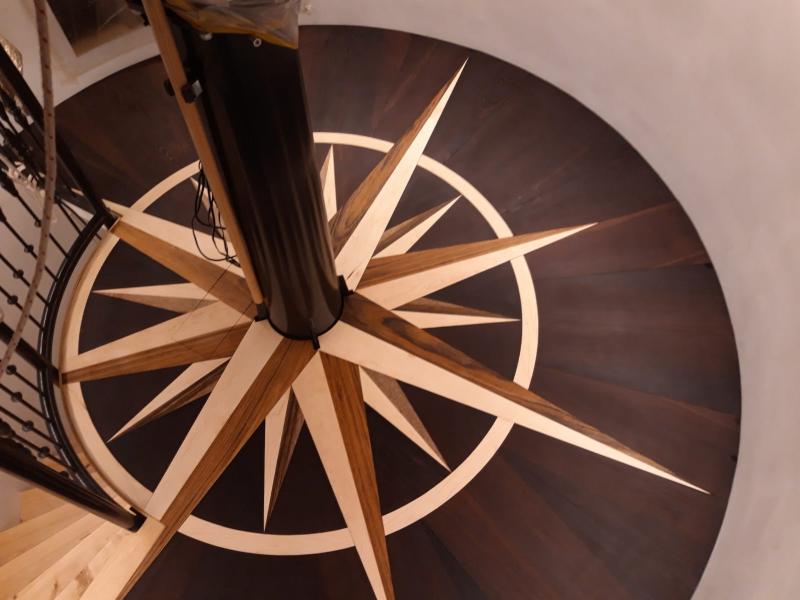 Figure 24: The floor of InFINNity Deck in Wengé, Amazakoue, and Maple. |
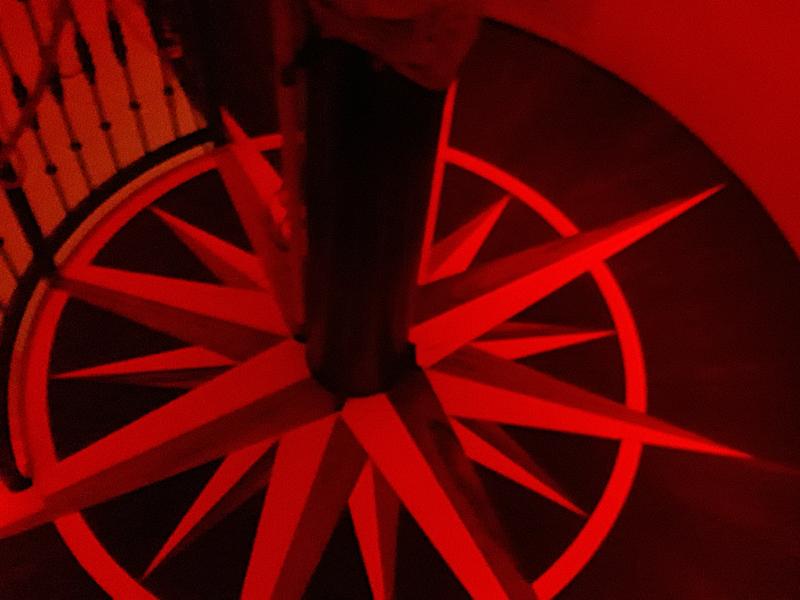 Figure 25: The floor at night with red illumination on looks as if the wind-rose is floating in air. |
InFINNity Deck... Astrophotography... Astro-Software... Astro Reach-out... Equipment... White papers...
The construction of Dome automation Time-lapses